
Setting up Whalebone DNS filtering
Prerequisites
- Access to the Kappa Data Whalebone tenant.
- A purchased Whalebone Immunity (DNS Security) license for your Barracuda firewall.
- A fixed WAN IP for your Barracuda firewall (dynamic IP’s will be supported later).
Setting up Whalebone DNS filtering
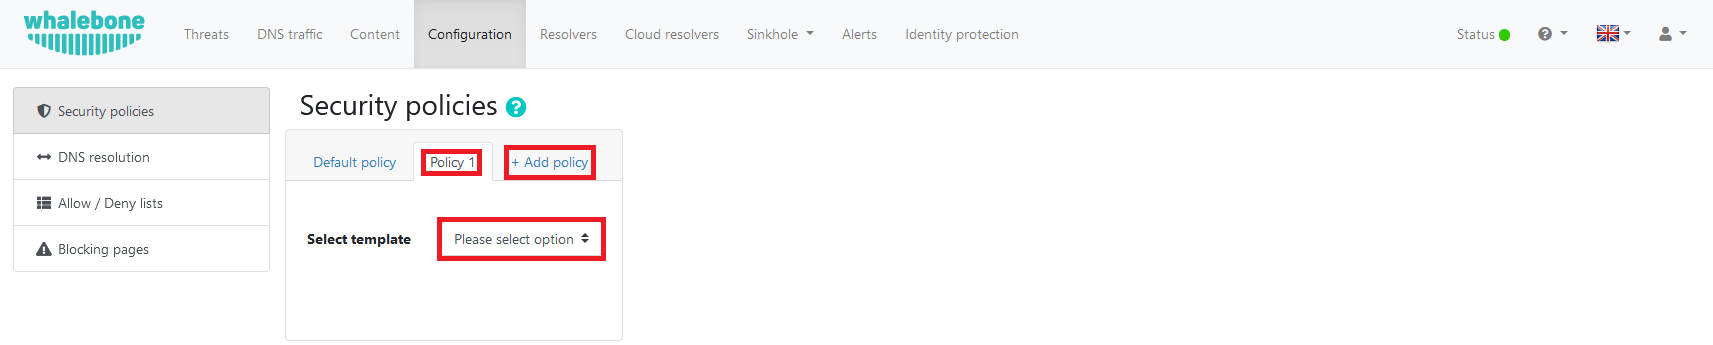
Go to https://login.whalebone.io and log in with your credentials. After logging in and switching to the end-user’s tenant, you’ll be taken to the dashboard. At the top, you’ll see a ribbon with different configuration menus. Click on “Configuration”.

You will arrive at the Security Policies page. Here, you can create a custom DNS filtering policy by clicking on “+ Add Policy.” This will generate a new policy with a generic name, which you can change after selecting an existing policy as a template for your new policy.
Whalebone DNS filtering assigns a score between 1 and 100 to each domain based on its content. The higher the score, the more likely the domain is malicious. In the policy, you can set thresholds to audit or block DNS requests depending on these scores.
By default, your thresholds will be set to 50 for auditing and 80 for blocking, which are also the values for the predefined “Block Carefully” level.
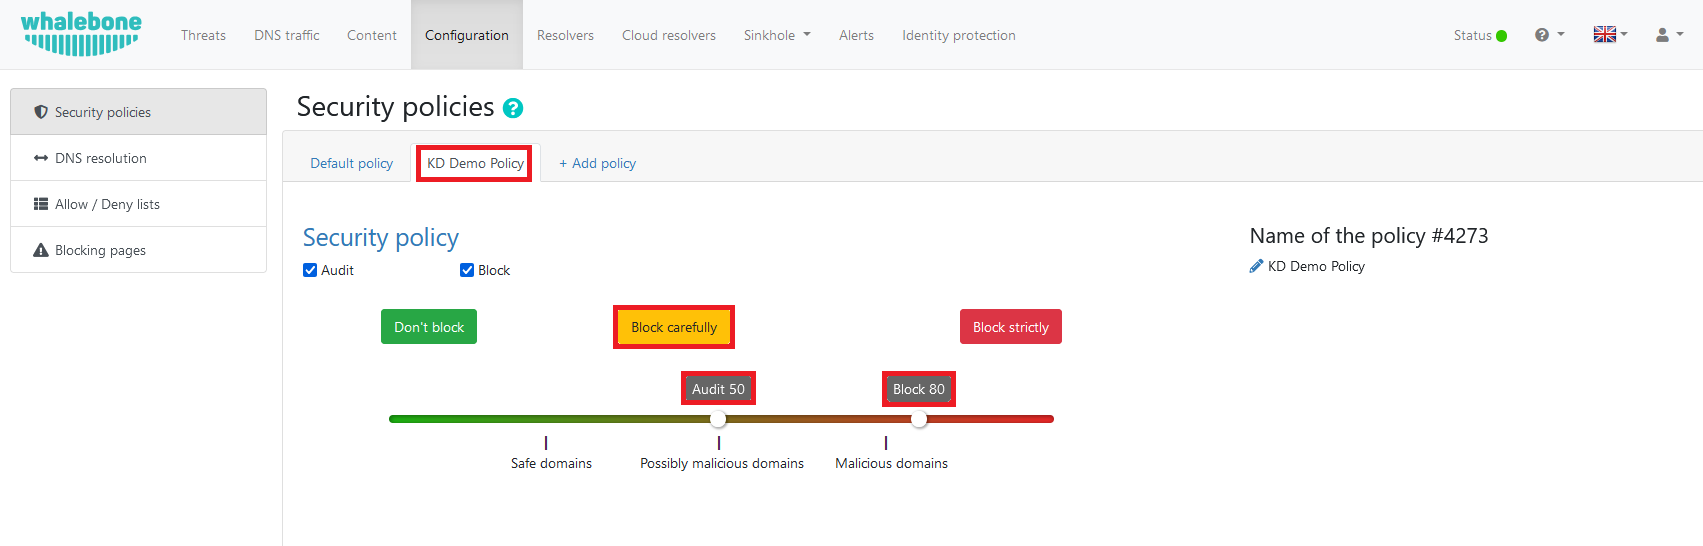
The “Allow” and “Deny” lists will be automatically linked to your policy, allowing you to manually configure domain names that will bypass the grading system under the “Allow / Deny lists” page.

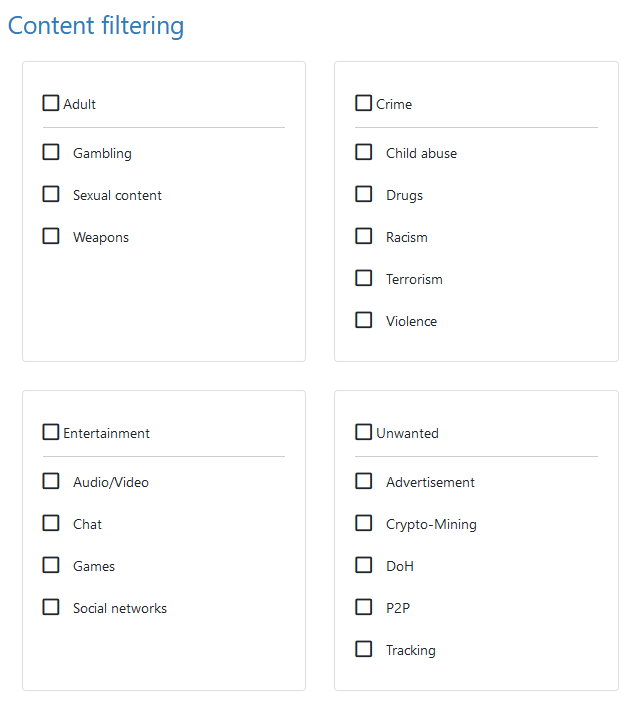
In addition to the grading system and manual lists, you can also block predefined categories of domains that may be reputable but are considered not safe for work.
You can adjust the blocking pages for all blocked DNS requests under the “Blocking Pages” section. By default, Whalebone uses your browser’s configured language settings to determine the language in which the blocking pages will be displayed.

Linking the policy to the WAN IP of the firewall
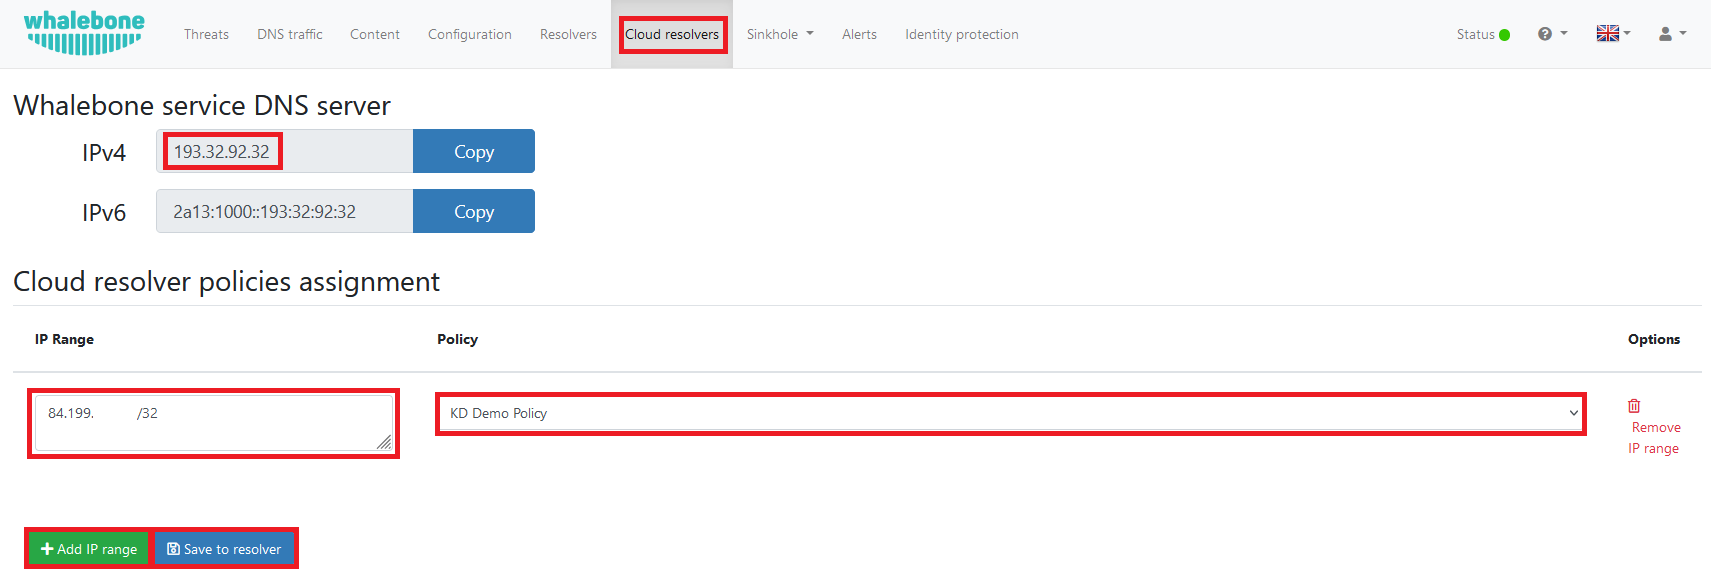
After creating the policy, you can navigate to “Cloud resolvers” in the top ribbon.
Here you can create an entry to link the WAN IP of the firewall to the created policy. After adding the entry, make sure you click on “Save to resolver” and take note of the DNS Server IP.
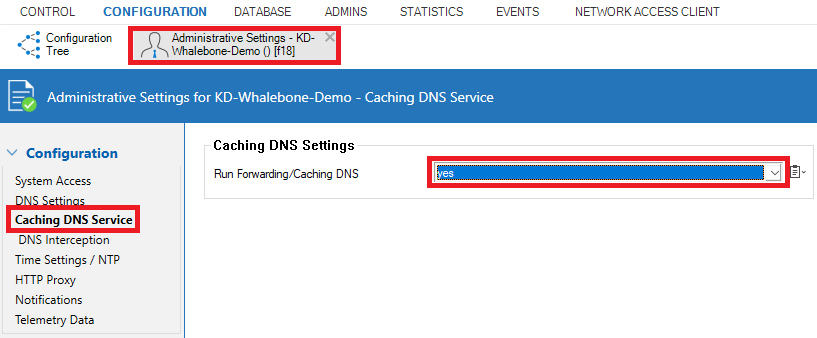
Firewall integration
Adjust the DNS servers used by the firewall under “Administrative Settings > DNS Settings” to those of the Whalebone cloud resolvers and enable the Caching DNS Service under “Administrative Settings > Caching DNS Service”.

Next, configure a DNS caching rule as shown below. Your source may vary depending on your current DNS setup and local networks. If a local DNS server is being used to which all clients send their DNS requests, you will need to modify the source of the DNS caching rule to match only the DNS requests being forwarded to the internet by the DNS server, ensuring that local resolution remains unaffected. If no local DNS servers are used, the standard DNS caching rule will apply.
